Mastering Hard Boiled Eggs in the Microwave


Intro
Making hard boiled eggs in a microwave seems like a simple task, yet it often trips up many cooks. The art of achieving that perfect boil with a firm, yet tender white and a rich yolk often leaves some feeling like they need a secret manual. This guide aims to unravel the technique of microwaving hard boiled eggs, walking you through the practical steps and nuances that can make all the difference. There’s a lot that can be learned from this process, not just for your egg-cooking endeavors, but for a deeper understanding of what happens when you apply heat to food.
Chefs' Classic Mistakes
In the kitchen, mistakes are part of the learning curve, and understanding these pitfalls will arm you with the knowledge to avoid them. Here are some common blunders that people make:
- Overcooking: This is probably the most frequently made mistake. Microwaves are powerful beasts, and adjusting cooking time based on your specific machine is crucial.
- Skipping the water: Always add water to the container with your eggs! Not doing so can lead to dry results and an even greater risk of exploding eggs.
- Not letting them rest: Once the eggs are cooked, patience is key. Let them sit in the microwave for a bit to allow even cooking.
But don’t worry! This guide will help you navigate through these hurdles like a walk in the park
Equipment Needed
While the right ingredients are undoubtedly vital, the tools you choose also play a major role in making your eggs a culinary success. Here are some essentials you will want to have on hand:
- A microwave-safe bowl (think glass or ceramic)
- A lid or a plate (to cover the bowl)
- A timer (make sure it's working!)
- A slotted spoon (for ease in removing the eggs)
Each of these will help in ensuring the process goes off without a hitch, yielding hard boiled eggs that you’d be proud to present at any meal.
"Cooking is like love. It should be entered into with abandon or not at all." – Harriet Van Horne
The Science Behind Microwaving Eggs
Microwaving isn’t just about pressing a button and waiting. Instead, it involves understanding the dynamic process wherein the microwaves generate heat in the eggs. This heat travels from the outside to the inside, creating steam and pressure. If the steam isn’t given an escape route, you may find yourself cleaning up egg from unexpected places!
By taking a moment to understand this science, you can manipulate it to achieve the best results. After all, knowledge is power, especially in the kitchen.
Stay tuned as we move forward, diving deeper into the how-to of microwaving hard boiled eggs, focusing on techniques, tips, and troubleshooting so that your eggs come out perfectly every time.
Intro to Microwaving Eggs
Microwaving eggs can sometimes feel like an overlooked life hack in the kitchen, yet it offers a plethora of advantages that align perfectly with our fast-paced lifestyles. This section aims to shed light on the significance of mastering the microwaving technique, particularly when it comes to hard boiled eggs. Microwave cooking retains not just the nutrition within the eggs, but also saves time, making it a handy tool for both novice cooks and seasoned chefs alike.
The Rise of Microwave Cooking
These days, the humble microwave has evolved from being merely a reheating appliance to a culinary powerhouse. Its journey began in the mid-20th century when it started as a convenient solution for busy households. The rise of microwave cooking has been meteoric, with an estimated 90% of US homes featuring one.
With jet-setting lives and a greater emphasis on speed in meal preparation, it's no wonder microwave cooking gained traction. The fascination lies in its simplicity; no need to fuss over pots boiling over or time management, just pop it in and let it buzz. This technological marvel allows us to cook quickly, without sacrificing flavor or texture, if used wisely.
Advancements in microwave technology have further bolstered its culinary potential, unlocking new methods for cooking that challenge traditional techniques. Today, microwaves are more than just reheaters; they are versatile tools that can effectively scramble, poach, bake, and yes, even boil.
Why Choose Hard Boiled Eggs?
Hard boiled eggs are a staple in many kitchens around the world. They're rich in protein, easy to prepare, and incredibly versatile. With the microwave approach, you can whip up a batch of hard boiled eggs in a fraction of the time it takes on the stovetop. This makes it ideal for meal prep or last-minute snacks, particularly for those busy weekday mornings.
- Health Benefits: Eggs are a powerhouse of nutrition. They contain essential vitamins like B12 and D, and are rich in minerals such as selenium and phosphorus. Microwaving preserves these nutrients well, as the cooking time is reduced and heat exposure is minimized.
- Versatility: There’s a world of creativity when it comes to hard boiled eggs. You can toss them in salads, make savory sandwiches, or enjoy them simply with a sprinkle of salt. The microwaving method gives you all the culinary freedom while keeping prep time to a minimum.
- Convenience: In our increasingly hectic lives, convenience cannot be underestimated. By mastering the art of microwaving hard boiled eggs, you empower yourself to create quick, nutritious meals that align with your busy lifestyle. With just a few simple steps, you can produce perfectly cooked eggs right in your kitchen—no chef's hat required.
With these considerations in mind, it's evident that learning to microwave hard boiled eggs presents an invaluable addition to any kitchen repertoire. As we delve further into this guide, you’ll discover not just the methodology, but also the exciting variations and tips that can elevate this simple food into a delightful culinary experience.
Understanding Egg Anatomy
Understanding the anatomy of an egg is crucial for anyone looking to master the art of microwaving hard boiled eggs. Knowing the various components can impact cooking times, textures, and overall results when attempting to prepare eggs. The intricacies of an egg's structure directly relate to how the microwave heats the contents within, making it essential to grasp how these parts interact during the cooking process.
The Structure of an Egg
An egg is composed of multiple layers, each serving a distinctive role. The outer shell, primarily made of calcium carbonate, protects the inner contents from bacteria and physical damage. Beneath the shell, you’ll find the inner and outer membranes. These membranes provide additional barriers against pathogens, ensuring that the egg’s nutrient-rich interior remains uncontaminated.
The albumen, or egg white, is a clear, viscous liquid that surrounds the yolk. It consists mainly of water but also contains some protein, providing a robust layer of protection for the yolk. The yolk, rich in fats and proteins, serves as a source of nourishment for the developing embryo in fertilized eggs. Understanding how these parts behave under microwaving is key to preventing mishaps.
When microwaving, it's important to realize that the egg white cooks faster than the yolk due to its lower fat content. Consequently, if both parts are heated simultaneously, you might end up with a yolk that is undercooked while the whites are rubbery. Having a solid grasp of an egg's anatomy can lead to a more controlled and successful cooking outcome.
Impact of Cooking Methods on Egg Composition
Different cooking methods can lead to varied results in terms of texture and flavor. Microwaving eggs, for instance, cooks them much quicker than traditional boiling. This rapid cooking can cause drastic changes in protein structure, particularly if not done carefully. For example, the rapid heat can create steam pockets, which may lead to the infamous "egg explosion," undeniably a mess you'd want to avoid.
Conversely, when boiled conventionally, eggs experience a gradual increase in temperature, allowing for a more uniform cooking process. The longer process allows proteins to denature and coagulate slowly, promoting a more tender result. Thus, finding the right balance in microwave settings is key.
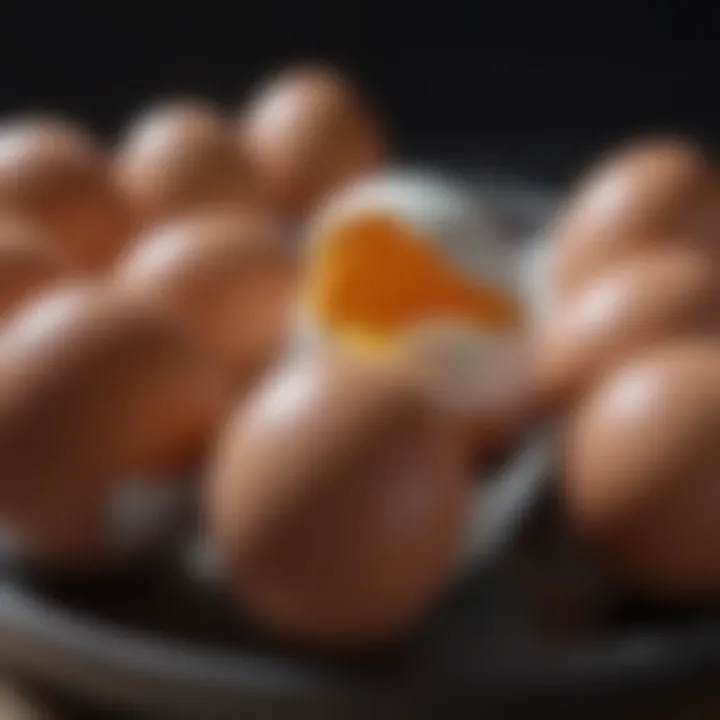
"Understanding how cooking methods influence egg composition is pivotal for getting that perfect microwave hard-boiled egg. Adjustments in timing and power setting help to achieve a tender egg without rubbery whites or an underwhelming yolk."
Required Tools and Ingredients
When it comes to microwaving hard boiled eggs, having the right tools and ingredients is critical for success. The process may seem straightforward at first glance, but a careful selection of each element ensures a smooth experience and delivers the results you desire. Here, we will break down the essential kitchen equipment and ingredient selection, emphasizing their roles and benefits.
Essential Kitchen Equipment
Microwave-safe bowl
A microwave-safe bowl is an absolute must for anyone looking to make hard boiled eggs in the microwave. The main thing to consider here is that not all bowls are created equally when it comes to microwave use.
The key characteristic of a microwave-safe bowl is its ability to withstand high temperatures without warping or releasing harmful chemicals. Popular choices include glass or certain types of plastic that are labeled as microwave safe. Using a bowl made from the wrong material can lead to melted plastic or even glass shattering, which is not the kind of surprise one wants in the kitchen.
A unique feature of these bowls is their varying sizes, allowing flexibility according to how many eggs you're cooking. Small size bowls can be easier to handle for single servings, while larger bowls suit bulk cooking. The only downside might be the occasional limited availability of certain designs, but any sturdy microwave-safe bowl will get the job done.
Cover or plate
The next important piece of equipment is a cover or plate. This simple tool plays a significant role in containing moisture and helping the eggs cook evenly. The idea here is to trap steam within the bowl, creating a more consistent cooking environment.
Most often, a microwave-safe plate would suffice as a cover. This is a beneficial aspect because it is easily accessible and does the trick quite well when you want to keep that moisture in. Using a cover minimizes the risk of eggs popping and making a mess all over the microwave. However, it's worth noting that if you use a lid that’s too tight, pressure might build up, so always choose a cover that allows for steam escape!
Measuring cup
Lastly, a measuring cup is quite handy for obtaining the right amount of water. Accurate water measurement is significant to ensure the eggs do not dry out or overcook.
The highlight of a measuring cup is its ability to provide precise measurements. It's a beneficial choice because it takes the guesswork out of how much water to use, which affects the egg's overall texture. A unique feature of these cups is the clear markings on the side, making it easy to see at a glance how much water you've added. Occasionally, people may overlook that a simple measuring device can drastically influence the cooking process, leading to the perfect hard boiled egg.
Ingredient Selection
Fresh eggs
When it comes to the eggs themselves, opting for fresh eggs is paramount. The freshness of an egg directly impacts its flavor and texture.
Fresh eggs typically have a firmer texture, making them easier to peel after cooking, which is a plus when you're microwaving. Moreover, the characteristic of having a tighter albumen around the yolk means less likelihood of a rubbery texture—you want your white to be as tender as possible.
On the downside, fresh eggs can sometimes be more expensive than older stock, but the taste and cooking performance are worth the extra dollars, especially for a culinary enthusiast.
Water
The water you choose to cook the eggs is more significant than it may appear. Water serves as the cooking medium, facilitating steam and heat distribution.
The key to water selection is ensuring it is clean and free from any unwanted tastes or impurities. Using purified or distilled water is a reasonable choice if you're keen on getting the best flavors out of your eggs. Its unique feature is that water can act as a regulator for cooking—altering the amount changes how quickly the eggs cook. It may sometimes require experimentation, as too much or too little water can lead to issues of dryness or boiling over.
Salt (optional)
Adding salt during the cooking process is an optional ingredient but it can provide interesting benefits. While seasoning the water may not directly alter the texture, it can enhance flavor significantly.
A notable characteristic of salt is that it can help with any residual odors from eggs, making your finished dish more appealing. It can also serve to slightly lower the boiling point of water, though this isn’t drastically noticeable in a microwave. One consideration is that not everyone prefers or requires salt, so it really boils down to individual taste preferences.
"Choosing the right tools and ingredients can elevate your microwaving experience from mediocre to exceptional. Every detail counts!"
In summary, understanding the importance of these tools and ingredients is crucial in microwaving hard boiled eggs efficiently. With the right setup, you’re well on your way to achieving cooking perfection!
Steps for Microwaving Hard Boiled Eggs
Microwaving hard boiled eggs may seem straightforward, yet there's an art to it that can make the difference between a flawless egg and a culinary disaster. This section will walk you through each step, highlighting the critical elements and benefits that this method offers. By following these detailed procedures, you’ll not only achieve perfectly cooked eggs but also elevate your kitchen skillset.
Preparing the Eggs
Preparation is key. Before diving into cooking, start with the right eggs. Freshness plays a significant role; choose eggs that are not close to their expiration date. A quick poke test can indicate freshness. If eggs sink when placed in water, they are fresh. If they float, it’s time to toss them out. Once you’ve selected your eggs, it’s best to give them a gentle rinse to remove any dirt or bacteria. This small step emphasizes hygiene, helping you avoid mishaps later.
Setting Up the Microwave
Your microwave should also be equipped for success. Start by selecting a microwave-safe bowl, as not all materials are created equal. Glass or ceramic bowls work well and maintain integrity under heat. Adding a cover or a microwave-safe plate can trap steam, aiding in even cooking. It’s crucial that the bowl is large enough to prevent spillage, allowing the eggs to sit without crowding. Additionally, add a bit of water—about half a cup per egg—to create steam, which helps in cooking the egg evenly.
Microwaving Process
Timing considerations
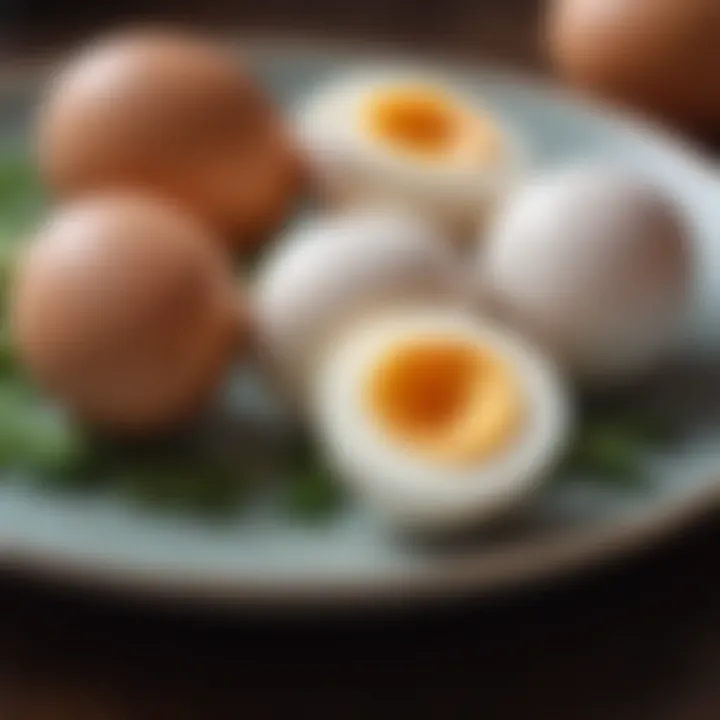
Timing is everything in the microwaving game. Depending on the wattage of your microwave, cooking times can vary widely. Generally, start with about 30 seconds to 1 minute for each egg, then check for doneness. The unique characteristic of microwave ovens is their capacity to rapidly heat—but that comes with a catch. Each microwave behaves differently, so this method might take some trial and error to perfect.
Setting the initial time too high can lead to very dry yolks; conversely, undercooking can result in a gooey mess. Emphasizing versatility, you can adjust these times based on how soft or hard you prefer your egg yolks.
Tip: Always round your timing to the nearest 30 seconds when checking eggs, to avoid the delicate balance tipping towards over-cooking.
Power settings
Power settings also play a pivotal role in how well your eggs turn out. Most microwaves offer several power levels, ranging from low to high. Cooking at a medium setting often gives you the best results, allowing the eggs to heat more evenly. The key to perfect eggs is distributing heat without causing the insides to overcook while the outside remains underdone.
A unique feature of adjusting power settings is the ability to control your results. It allows for fine-tuning your cooking process. Starting at medium power can help prevent those annoying rubbery textures often associated with overcooked eggs.
Cooling and Peeling the Eggs
Once you’ve microwaved your eggs, you must let them cool down. This is important to ensure they don’t continue to cook in their residual heat. Plunge them into an ice bath for about five minutes. This cooling step not only stops the cooking process but also contributes to easier peeling.
Peeling can often intimidate the cook. A helpful hint is to gently tap the eggshell on a hard surface to create cracks before starting to peel. Begin peeling at the wider end where the air pocket resides; this usually gives you a good starting point.
In summary, mastering the steps to microwave hard-boiled eggs involves careful preparation, appropriate settings, and attention to timing. Small actions can lead to significant outcomes.
Understanding Potential Risks
When it comes to microwaving hard boiled eggs, understanding the risks is crucial for a successful cooking experience. Microwaves, while convenient, can sometimes lead to unexpected mishaps if not used properly. These risks—primarily explosions and overcooking—can deter one from utilizing this efficient method. However, being informed and prepared can not only enhance the safety of your cooking but also improve the quality of your eggs.
Avoiding Explosions
One of the main dangers of microwaving eggs is the possibility of an explosion. This happens due to the quick build-up of steam inside the shell while cooking. The shells can trap heat and steam, and without a way for that steam to escape, the result can be quite the mess—and a potentially dangerous one at that.
To prevent explosions, consider the following precautions:
- Always pierce the shell: Use a pin or a fork to puncture the eggshell before microwaving. This allows steam to escape and significantly reduces the chances of an explosion.
- Cover the bowl: After placing the eggs in a microwave-safe bowl filled with water, cover it loosely with a microwave-safe lid or plate. This keeps the moisture in while providing a safe escape route for any steam.
- Monitor cooking time: Start with shorter cooking intervals. Check on the eggs every minute or so. This will help you respond quickly if you notice any unusual bulging of the shell.
"Experiment wisely; your kitchen shouldn’t turn into a science lab gone rogue."
Addressing Overcooking
The second risk in microwaving hard boiled eggs is overcooking, which can lead to unsatisfying results. An overcooked egg can be rubbery, with a greenish yolk, affecting both texture and flavor. Just like a flower in direct sunlight, eggs can only withstand so much microwave exposure before they wilt.
To minimize the risks of overcooking, keep these tips in mind:
- Experiment with cooking times: Different microwaves have varying power levels. Start with a recommended time but adjust based on the performance of your specific appliance. A common suggestion is about six to eight minutes depending on the number of eggs.
- Use a timer: Consistency is key. Set a timer to avoid spacing out during cooking. This simple act ensures that you remain vigilant and don’t walk away or get distracted.
- Cool down immediately: After microwaving, plunge the eggs into cold water or put them under running water. This stops the cooking process and prevents any residual heat from continuing to cook the eggs.
Utilizing these understanding, you can navigate the potential pitfalls of microwaving hard boiled eggs while still enjoying a quick and convenient cooking method.
Variations on Hard Boiled Eggs
When it comes to hard boiled eggs, the variations are as endless as a summer's day. Understanding how to modify cooking times, textures, and flavor additions not only elevates the mundane to the magnificent but also caters to a range of tastes and preferences. This section is dedicated to exploring these variations so you can adapt your hard boiled egg experience. After all, who wants to stick with the same old routine when there’s a world of flavors just waiting to burst into your kitchen?
Different Cooking Times
Cooking times play a pivotal role in the outcome of hard boiled eggs. While the basic principle is straightforward—boil the eggs for a specific duration—the nuances in time can make or break the perfect egg. A typical guideline might suggest around 9 to 12 minutes depending on the desired yolk firmness. Yet, adjusting even by a minute can shift the texture from a creamy middle to a powdery solids.
Notably, here are some key points to consider when experimenting with different cooking times:
- Medium: For a slightly creamy yolk, aim for approximately 9 minutes.
- Well-Done: If your taste leans towards a firmer yolk, extend it up to 12 minutes.
- Testing Consistency: It’s beneficial to test a batch of eggs to ensure your timing aligns with your preference.
So, if you're not exactly sure what you like, don’t hesitate to play around. Your perfect hard boiled egg is out there, just waiting for you to discover it.
Flavor Enhancements
Adding flavors to your hard boiled eggs is like dressing a canvas with vibrant paint. Here, we will dive into three main categories: herbs, spices, and acidic components, that can trim your eggs from ordinary to extraordinary.
Herbs
Herbs are nature's little flavor bombs, giving a fresh twist to hard boiled eggs. Whether you sprinkle fresh dill or chives, herbs add a delightful brightness. The aromatic hint of thyme can lift an egg dish or transform it into a gourmet offering.
Key characteristics of herbs include:
- Freshness: Their bright flavors can cut through the richness of the yolk, balancing the taste
- Versatility: Herbs can be mixed into mayonnaise for egg salads or simply used as garnish.

However, it's worth noting that not all herbs shine equally when used in cooked dishes. Some herbs lose their essence when subjected to heat. So, using fresh herbs post-cooking tends to yield better results.
Spices
Spices can whisk your hard boiled eggs into a whole new dimension. From paprika to cayenne, the right spice can provide warmth or a kick that wakes up your taste buds. Spice can transform a simple breakfast into a feast.
The beauty of spices lies in:
- Diversity: Each spice has a unique flavor profile that can cater to any palate—smoky, fiery, sweet.
- Health Benefits: Many spices come with their perks, such as anti-inflammatory properties or antioxidants.
However, be precise with amounts. Too much can overwhelm the delicate taste of the eggs, turning a culinary attempt into an unpalatable experience.
Acidic components
Acidic components, such as vinegar or citrus juices, introduce a tang that can elevate the flavors of hard boiled eggs significantly. A drizzle of lemon juice or a splash of vinegar can enhance the overall palate while also providing a contrasting taste against the creaminess of the yolk.
Some pivotal thoughts on acidic components:
- Enhancement of Flavor: Acidity can round out the richness, making every bite refreshing.
- Balancing Act: Finding the right balance is essential, as too much acidity can overshadow the egg's subtle flavors.
Storage and Usage Tips
Storing and using hard boiled eggs correctly is crucial to ensure both safety and taste, especially when microwaved. After cooking, the right storage techniques not only help maintain the texture and flavor of the eggs but also reduce the risk of spoilage and foodborne illnesses. The freshness of your hard boiled eggs directly relates to how they were stored post-cooking. Whether you plan to eat them right away or keep them for later, knowing the best practices can make a world of difference.
Proper Refrigeration Techniques
When it comes to the proper refrigeration of hard boiled eggs, keeping them cool is a must. Ideally, cooked eggs should be stored in the shell to prevent them from absorbing strong odors from the fridge. This is a simple but effective way to keep them tasty and fresh. If you’ve already peeled your eggs, place them in a covered container with a damp paper towel to retain moisture and minimize drying out.
Take note that hard boiled eggs can be safely stored in the refrigerator for about one week. It's best to label the container with the date they were cooked, so you don't have to guess later on. Keeping track of freshness is especially vital for those who like to meal prep. Always store them in the main part of the fridge instead of the door, where temperatures fluctuate more widely.
Creative Recipe Ideas for Leftover Eggs
Hard boiled eggs are not just great on their own; they can be transformed into delightful dishes. Here are some ideas to maximize your leftovers.
Salads
Using hard boiled eggs in salads adds a protein punch while enhancing the texture. A classic choice is a Nicoise salad, which combines greens, olives, tomatoes, and tender potatoes, giving a hearty feel to your meal. What makes salads so attractive is their versatility; you can toss in various ingredients to suit personal tastes or seasonal offerings.
A unique feature of salads is the ability to play with different textures and flavors. However, be mindful that overly dressy salads might overwhelm the delicate egg flavor. It's always a balancing act to maintain the integrity of each ingredient, especially in a dish where hard boiled eggs should shine.
Sandwiches
Sandwiches made with hard boiled eggs, like an egg salad sandwich, can be a quick, filling option for many meals. Mix the yolks with mayonnaise and mustard, add a dash of salt and pepper, and spread it between two slices of your favorite bread. The key characteristic of sandwiches is their convenience. On busy days, they are a lifesaver for breakfast or lunch.
However, be cautious about how much dressing you add. Too much mayo can lead to a soggy situation, so finding the right balance is essential. A well-made egg sandwich is not just filling; it can also be quite nutritious.
Appetizers
Hard boiled eggs can also serve as impressive appetizers, especially when deviled or stuffed. This specific aspect allows for creativity in presentation and taste. For instance, blend the yolks with spices and garnish with paprika or chives for a pop of color. These bites are often considered impressive for gatherings, lending an elegant touch to your appetizer spread.
A unique feature of appetizers like this is their ability to be prepared ahead of time. However, make sure to consume them within a couple of hours of serving to maintain the freshness. Arranging these on a platter can create an aesthetically pleasing presentation that elevates any gathering.
Keeping hard boiled eggs in an organized and thoughtful manner can lead to exciting culinary creations while minimizing waste. Whether you're sprucing up a salad, crafting quick sandwiches, or dazzling guests with appetizers, understanding storage and usage can serve as a pathway to delight in the kitchen.
Ending and Final Thoughts
Microwaving hard boiled eggs offers a modern and efficient approach to this classic cooking method. The convenience is a huge plus, especially for those with busy schedules or minimal kitchen time. With just a few minutes and the right techniques, you can produce perfectly cooked eggs that are ideal for salads, snacks, or even standalone dishes.
The Convenience of Microwaved Hard Boiled Eggs
The sheer ease of using a microwave for hard boiled eggs should not be underestimated. Gone are the days of waiting for a pot of water to boil or worrying about how long to boil the eggs just right. Instead, using a microwave allows you to bypass these steps entirely. You simply need to follow a few straightforward procedures:
- Quick Preparation: Place the eggs in a microwave-safe bowl, cover with water, and that’s it.
- Time Efficiency: With settings that can perfectly cook two or three eggs in just minutes, this method fits seamlessly into a fast-paced lifestyle.
- Less Cleanup: Fewer utensils and less mess mean less time scrubbing pots and pans after. All you need is a bowl and a cover.
In today’s world, where multitasking is the norm, the convenience of microwaved eggs acts as a lifesaver. Plus, the versatility of hard boiled eggs makes them a reliable option for breakfast, lunch, or as a quick snack anytime during the day.
Encouraging Kitchen Experimentation
Once you have mastered the basic process of microwaving hard boiled eggs, it can be tempting to stick to the same routine. However, the kitchen is a realm of creativity, and this method surely invites some experimenting. Here are a few ways you could spark that culinary curiosity:
- Different Seasonings: Try adding a pinch of salt or even some herbs to the water prior to cooking. This infuses some flavor directly into the eggs.
- Varying Cooking Times: Experiment with different timings to achieve your preferred yolk texture—whether you like it a bit runny or fully firm.
- Eggs from Different Sources: Using organic eggs or farm-fresh varieties can offer surprising flavor differences.
The prospect of personalizing your cooking experience is vital. Don’t hesitate to play around with the basics. You may discover an unexpected favorite or an innovative way to serve hard boiled eggs that you never thought of before.
"Cooking is an adventure; put on your chef's hat and explore the endless possibilities."


